How to hang our wallpaper and wall murals
Our premium wallpaper is easy to hang using the Paste-the-wall method. The paste is applied directly to the wall and the strips can be slightly adjusted sideways while hanging. A detailed guide is included with all orders and below you'll find some in-depth tips and tricks.
Before you start
Take the wallpaper out of the package and allow the rolls to open up and unravel a bit. Store them like this within the room where they will be installed, for at least 24 hours to let the wallpaper acclimatize to the humidity. This is important to minimize the risk for shrinking and visible seams.
Make sure your walls are smooth, clean and dry. A checklist for preparing different types of walls can be found here .
Make sure you have the tools needed before you start. Everything you need can be found in any local paint- or hardware store.
All DIY is easier and more fun together and installing wallpaper is no different. So let your friend, family, crush, or colleague know you’re in need of their services. And don’t forget to offer them pizza.
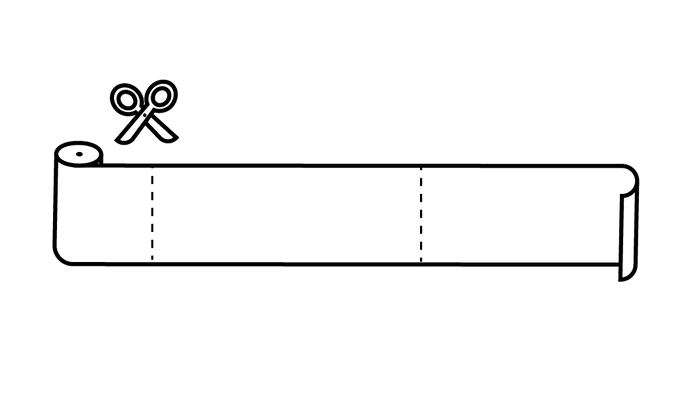
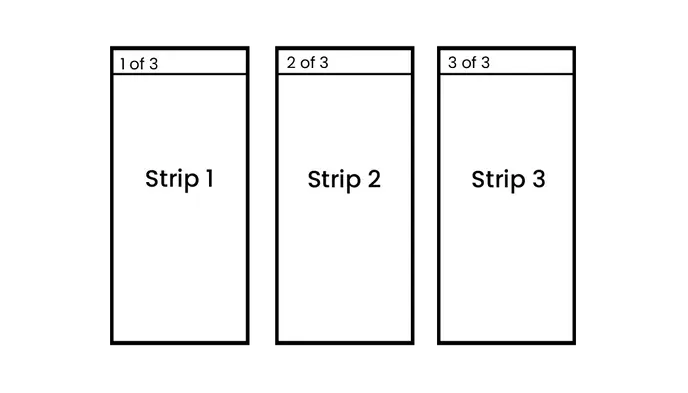
1. Arrange your wallpaper strips
- Unroll the wallpaper roll and cut between the dotted lines to separate each strip of the design. The length of each strip equals the height of your room.
- Identify each strip by the number at the top and arrange them in hanging order on a clean space on the floor. The strips are numbered from left to right (strip number one is always to the left).
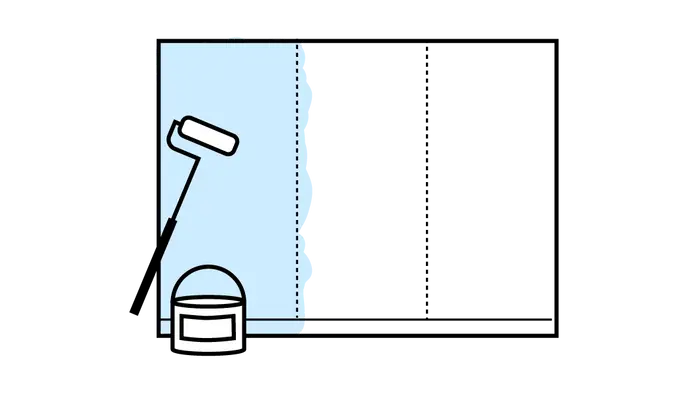
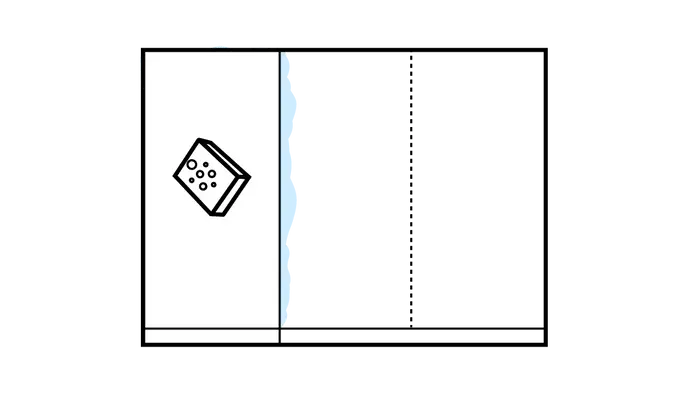
2. Paste the wall
- Hanging the first wallpaper strip straight is important as it guides the following ones. Use a pencil to mark the width of the strip on the wall. Then use a plumb or spirit level to draw a fine vertical line where the right-hand side of the strip should be placed. The line will help you get that first one straight.
- Apply the paste directly to the wall where the first strip will go, making sure you cover a few extra centimeters past your pencil mark. Make sure the paste is distributed evenly and isn't allowed to dry before the strip is hung.
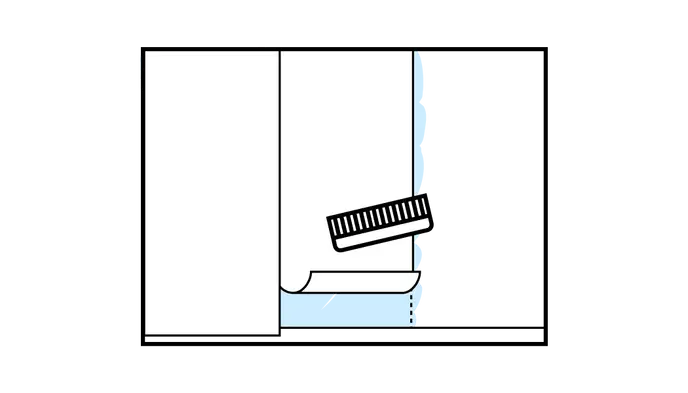
3. Hanging the first strip
- Each strip is numbered at the top and has a dotted line where the design starts. Make sure you have strip number one.
- IMPORTANT: If you have added a safety margin to your measurements on ordering, make sure that you center the strip on the wall vertically so that you have an equal amount of margin at the ceiling and the floor. (Example: If you have added a 3 inch margin, make sure to have 1.5″ stick out at the top and 1.5″ stick out at the bottom). By doing so, you have some extra margin if the ceiling or floor is sloped.
- Line up the strip along the mark you made on the wall. Begin by applying the wallpaper at the top of the wall, make sure it sticks properly and work your way downwards, smoothing out bubbles as you go with the help of the plastic smoother or brush.
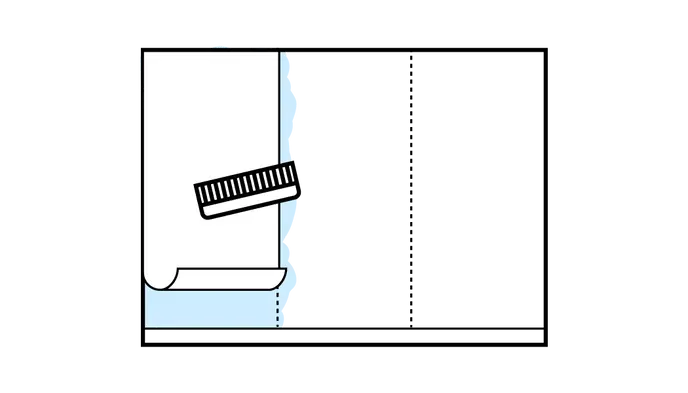
- Use a damp sponge or cloth to wipe off any excess glue that might have gotten on the surface of the strip.
4. Hanging the following strips
- Since the first strip is straight, there’s no need to mark out the following ones with a pencil. Just follow the edge of the previous strip and make sure they're installed edge to edge without any overlap.
- Once again, apply the glue directly to the wall and cover the section of the next strip plus a few extra centimeters to the right.
- Again, start from the top and make sure to visually align and match the design with the previous strip. Firmly press the two edges together and make sure there is no visual seam in between the strips.
- Smooth out any bubbles with the plastic smoother or brush and wipe away any excess paste. Look out for paste between the strips or on the surface of the print. Use warm water and a damp clean sponge to wipe it off.
- Continue until all the numbered strips are up.
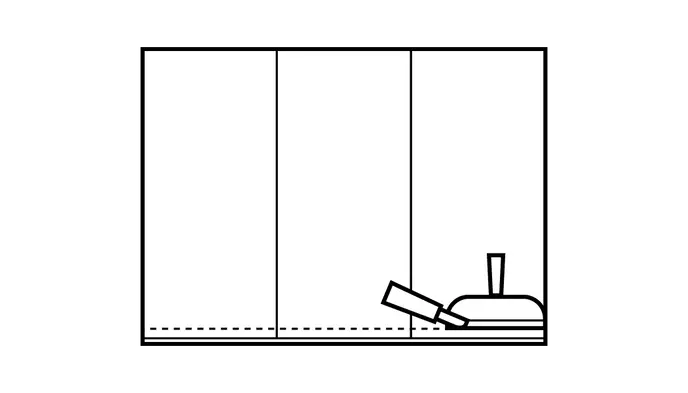
5. Trimming and drying
- Once all strips are up, use a sharp knife and a straight edge to trim away any excess paper at the top and bottom of each strip.
- Allow the wallpaper and paste to dry at room temperature and with good ventilation for at least 24 hours. If there’s a radiator on the actual wall, shut it off during the drying process to reduce the risk of uneven shrinking.
- Et voilà! You're done. Enjoy your new wall and send us a picture of the result!
