How to install Peel & Stick
Our Peel & Stick is a premium self-adhesive product that sticks to smooth walls without using paste. Not only is it pre-pasted, removable, renter-friendly, and easy to hang – it’s just as eco-friendly as our premium wallpaper and has the exact same look and feel. No shiny vinyl, no PVC, and no toxins – a clean revolution for your walls.
NOTE: NOT SUITABLE FOR TEXTURED WALLS
Preparing your walls for Peel & Stick
- Take your time to check that the surface is smooth. This is especially important for Peel & Stick as it’s not recommended to install any self-adhesive wallpaper to textured walls. If the wall has a light texture, orange peel, knockdown, or a rough surface, the Peel & Stick wallpaper will not stick properly. A checklist for preparing different types of walls to make them smooth can be found here .
- Clean the surface with warm water and mild soap, using a damp cloth or a sponge. Allow the walls to dry for at least 24 hours.
- If the wall is freshly painted, it’s important to make sure that the paint has cured completely, this can take as long as 4-6 weeks depending on the type of paint (read on the bucket to find out).
The day before installation
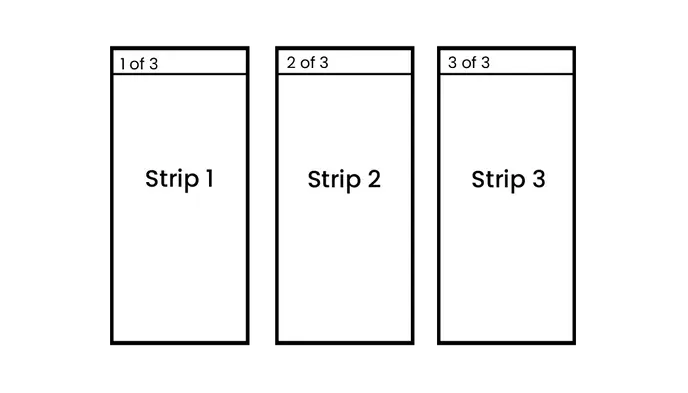
- Take the wallpaper out of the package, unroll the wallpaper roll, and cut each length along the cutting marks separating each numbered strip.

- Identify each strip by the number at the top and lay them flat on a clean space on your floor. Put them with the label facing upwards, in numerical order with strip number one on top. Then you’ll have them in the right hanging order the next day.
- Store the strips like this – flat (not rolled up) for at least 24 hours in the room where you intend to hang them. This will allow the wallpaper strips to straighten out and acclimatize to the humidity, which will make them adhere better to the wall. The acclimatization is also important to counteract shrinking which can lead to visible seams after installation.
- Make sure you have the tools needed before you start. A complete list can be found here. Everything you need can be found in any local paint- or hardware store.
- All DIY is easier and more fun together and installing wallpaper is no different. So let your friend, family, crush, or colleague know you need their services. And don’t forget to offer them pizza.
Hanging Peel & Stick
Before we start, make sure you get the basics:
- Make sure the wall is smooth and clean.
- Make sure you have allowed the strips to lay flat for at least 24 hours before you apply them.
- All the strips are numbered in the order they should be hung, from left to right. When facing the wall, always start on the left-hand side with strip number 1 . However, if your wall is sloped with the highest point being on the right hand side, we recommend starting to the right and hanging the strips in reverse order.
- The strips are supposed to be hung edge to edge without overlap .
- Make sure the first strip is vertically straight .
1. Hanging the first strip
- Make sure you start with strip number 1. Facing the wall, start on your left-hand side.
- Hanging the first wallpaper strip straight is important as it guides the following ones. Use a pencil to mark the width of the strip on the wall near the ceiling. Then use a plumb line or spirit level to draw a fine vertical line down the wall where the right-hand side of the strip should be placed. The line will help you get that first one straight.
- Line up the first strip along the pencil line. IMPORTANT: If you have added a safety margin to your measurements on ordering, make sure that you center the strip on the wall vertically so that you have an equal amount of margin at the ceiling and the floor. (Example: If you have added a 3 inch margin, make sure to have 1.5″ stick out at the top and 1.5″ stick out at the bottom). By doing so, you have some extra margin if the ceiling or floor is sloped.
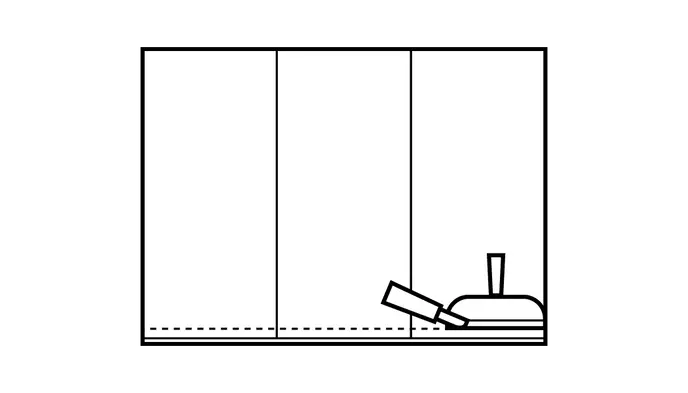
- Starting from the top of the wall, peel the paper from the backing about 10 inches at a time and apply the wallpaper to the wall before you unpeel the next part. Do not remove all of the protective paper at once. Work your way downwards and smooth the paper with your hands as you go. Find your way, we recommend smoothing from the middle and outwards to the edges of the strip to swipe away any air bubbles.
2. Hanging the remaining strips
- Hang the next strip to the right of the previous one and match up the pattern. Make sure the strips are not overlapping and are put edge-to-edge without any visible seams.
- If your strip is not perfectly positioned, don’t worry, you can carefully loosen it and reposition it again.
- Smooth out air bubbles along the way. Use your hands, a wallpaper brush, or plastic smoother.
3. Smoothing the strips
- Once all strips are up on the wall, use a plastic smoother or wallpaper brush with a fair amount of pressure to go over the full wall and smooth out any remaining air between the strip and the wall. This is an important step to make sure the wallpaper fully sticks to your wall.
4. Cutting the excess paper
- Once all strips have been hung and are firmly stuck to the wall, trim away any excess paper along the ceiling and the floor. Make sure to use a sharp wallpaper knife with a fresh blade to avoid tearing the paper!
- Nice work, you’re done! Enjoy your new wall and please share the result with us!
When to choose Peel & Stick
- Renter-friendly. If you live in a rental and your landlord doesn’t want you to put up regular wallpaper, Peel & Stick is the perfect solution.
- Temporary installations. If the installation is only for a limited time, like for an event or in a kids’ room where you’d like to change the motif more often, Peel & Stick is the way to go.
- Small areas. If you have a small single wall or a feature wall, Peel & Stick is the perfect option.
When not to choose Peel & Stick
- Textured walls. If you have textured walls and don’t intend to smoothen them with a wallpaper primer or skim coat first, we recommend using non-woven instead.
- Permanent installation. If it’s for a permanent installation or in a commercial setting with a somewhat higher degree of wear and tear, we recommend choosing non-woven.
- Varying humidity. Peel & Stick is not suitable in rooms with significant temperature changes or varying humidity, such as bathrooms.
Frequently asked questions
How long does Peel & Stick wallpaper last?
If properly installed, Peel & Stick wallpaper will last for at least 5 years or longer. However, it does not last nearly as long if applied incorrectly or if it has been removed and reapplied more than once.